Combine strokes and outlines

User interface overview Adobe Illustrator

Install from Adobe Exchange

Manual Installation on Windows

Start drawing in Adobe Illustrator

Create styles

Convert to outlines in Adobe Illustrator

Install with Anastasiy’s Extension Manager

Uninstall LTTR/INK with Extension Manager

Uninstall LTTR/INK with Creative Cloud

Running the plugin on Mac with the M1 chip

Getting an installation error on Mac - “Extension license is damaged (Error 6xx)”

The plugin doesn’t work on Windows — Grey panels

Report bugs

Recover from a crash

Known Issues

Stroke styles

How to install the LTTR/INK Glyphs plugin

Activate licence

User interface overview Glyphs

Start drawing

Interpolate strokes

Convert to outlines

Troubleshoot INK for Glyphs

English Script Calligraphy

Psychedelic Script

Modern Calligraphy Lettering

Latent Space Font Interpolation

Font style transfer

User interface overview Glyphs

Click on the "L" icon in the Glyphs tool-bar with settings will appear at the bottom:
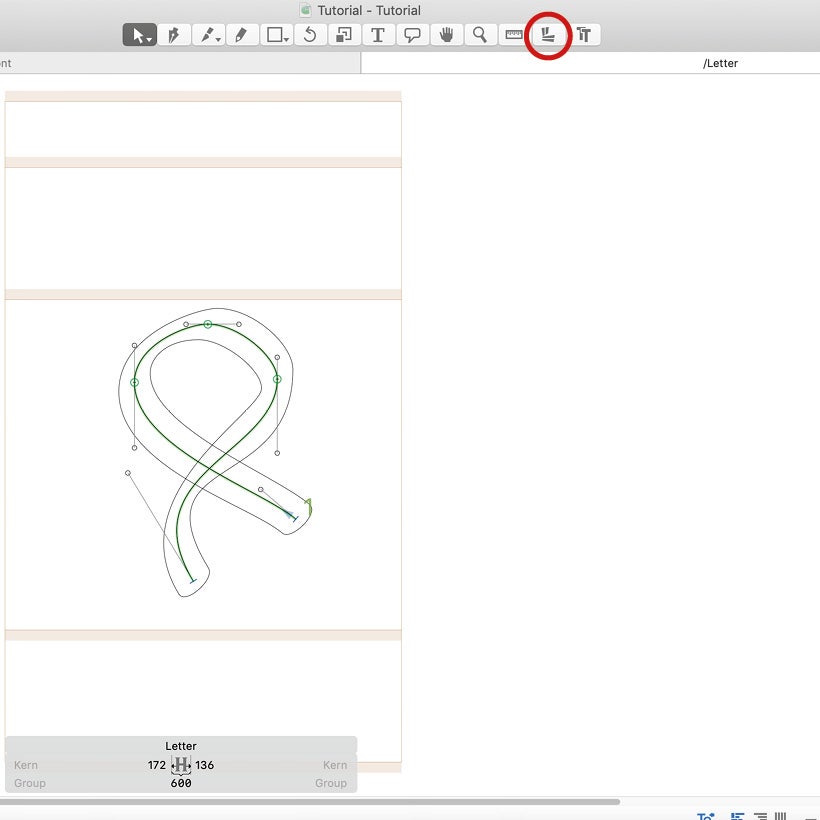
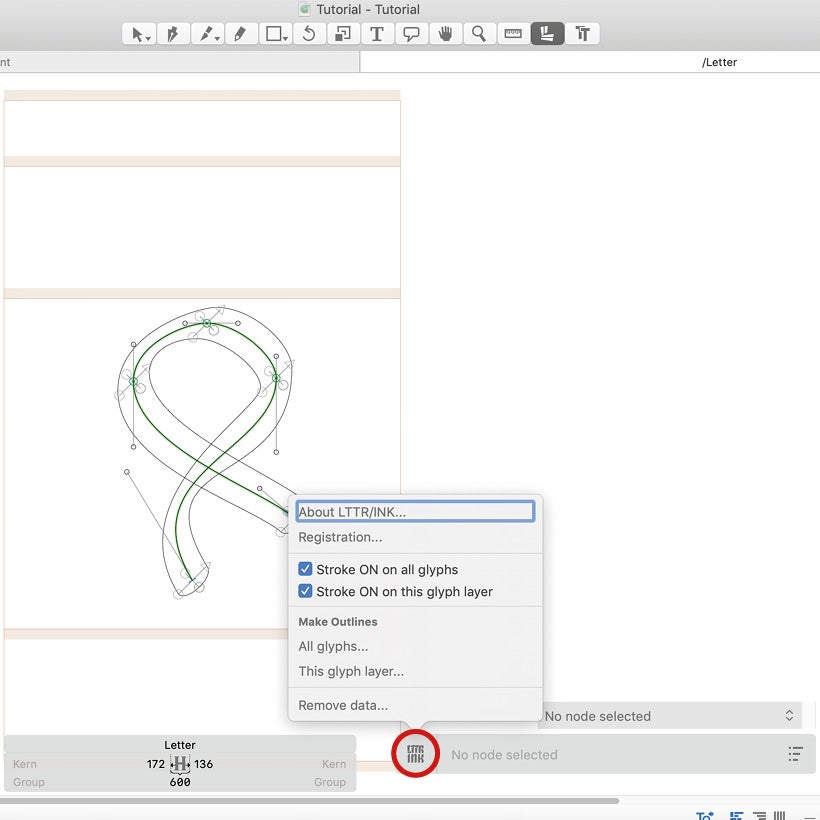
To view the outline of the skeleton you have to check the Stroke ON option.

The LTTR/INK icon in the lower menu allows you to change all the parameters and set the style of the stroke.
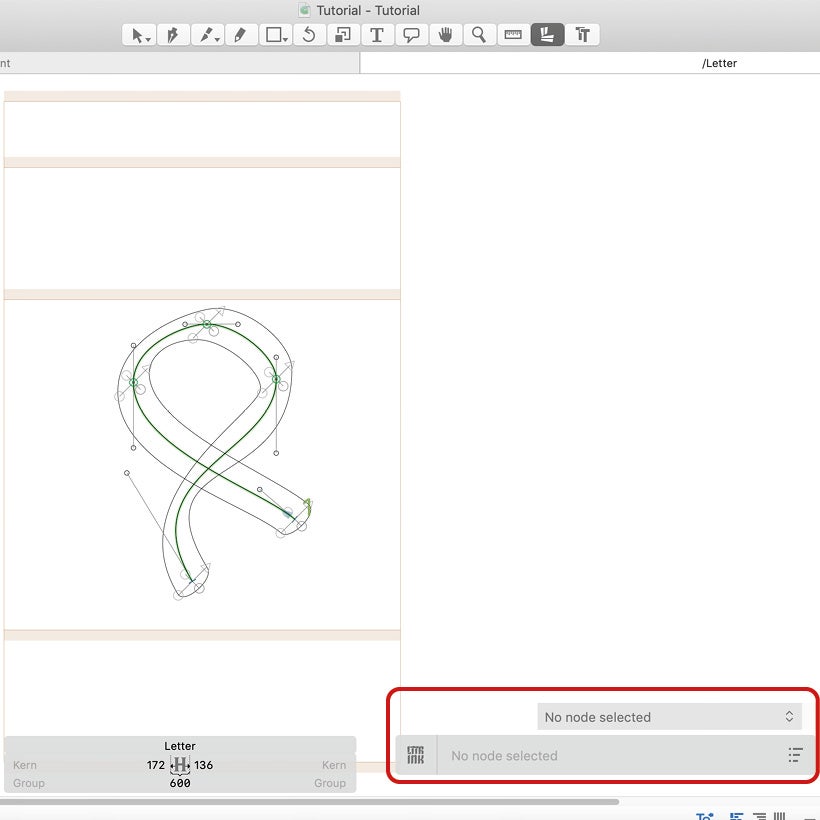
The default setting of the stroke is:

30 pt wide

15 pt height

45° angle

Parameters can be changed either by overwriting in this menu (you must have a marked point or the points you want to change), or directly manually when dragging the vectors of the selected point.

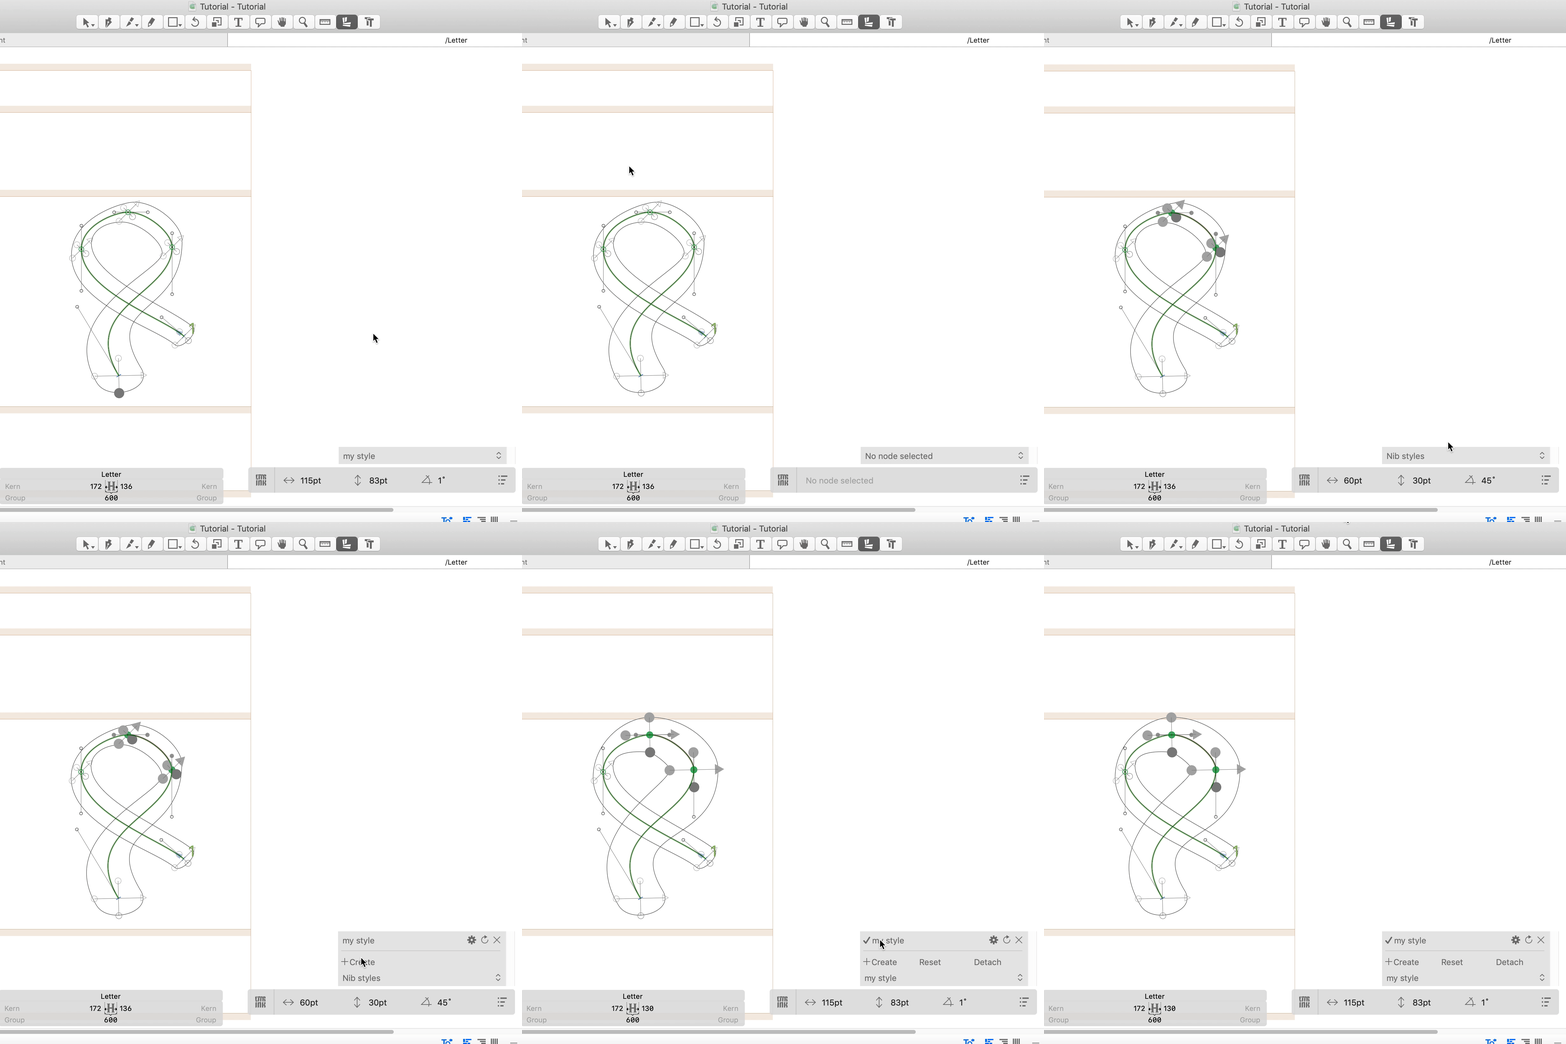
1. Mark the point whose parameters you want to use again

2. Click on the "Create" button, write the name of the style, e.g. "my style"
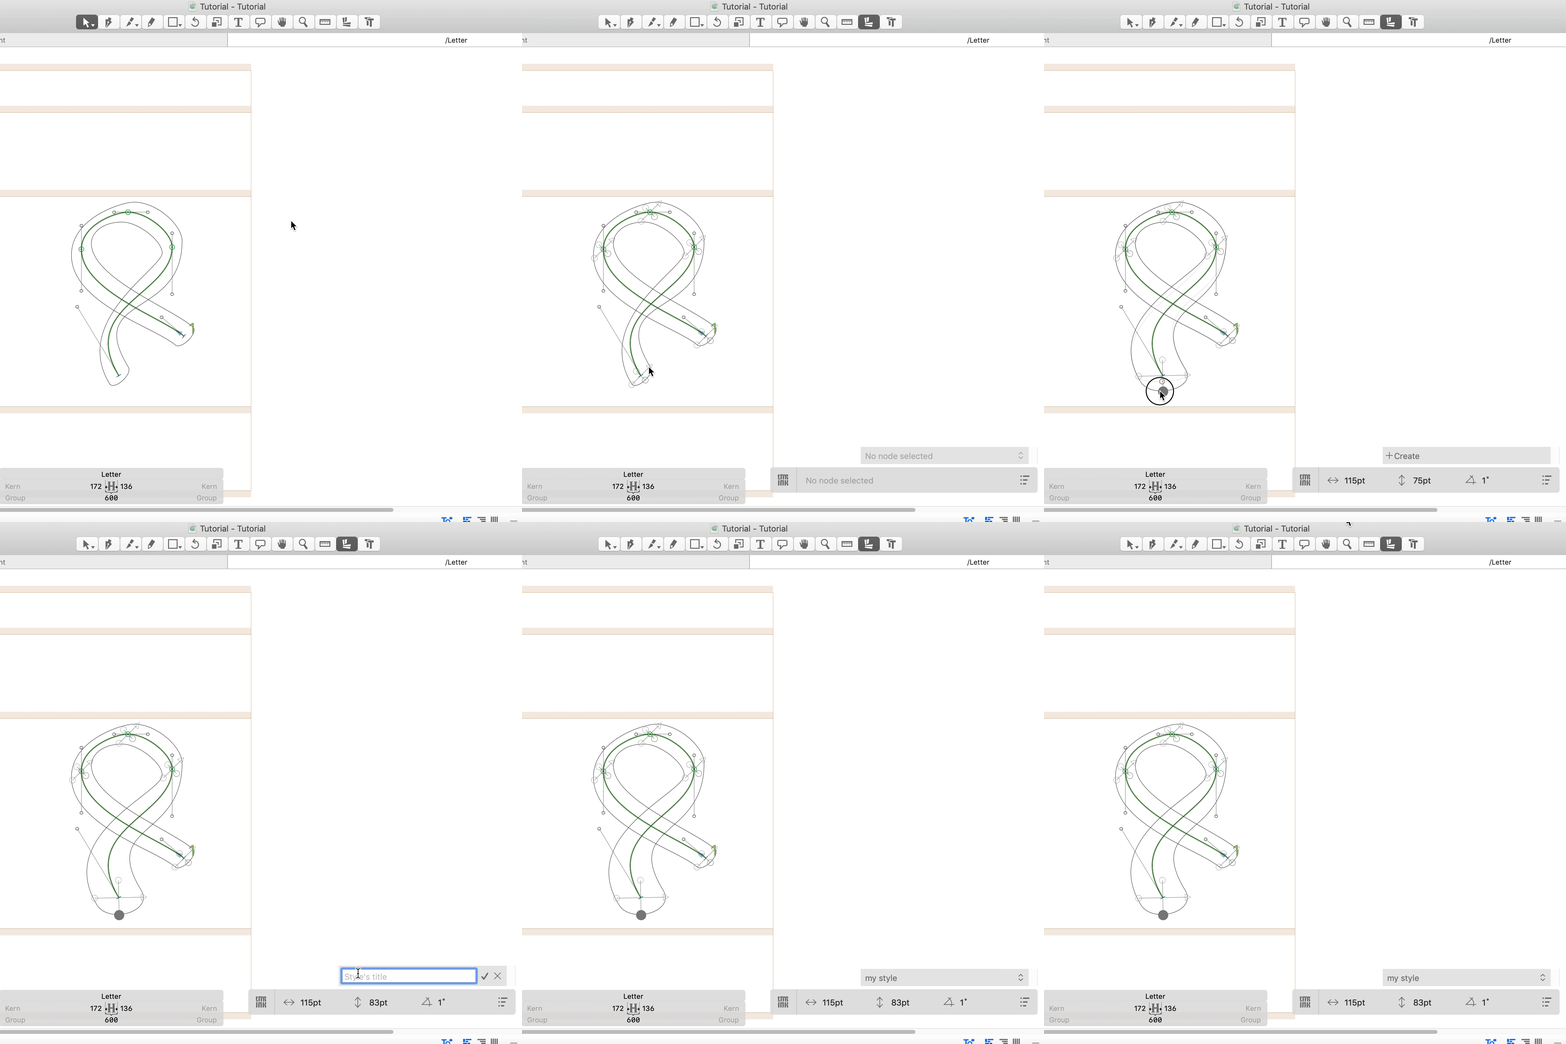
3. Select the point (or points) to which you want to convert these parameters and click on "Nib styles" again in this table. The menu with the defined styles will expand – in this case, there will be "my style"

Still, need help? join the community here